Installation, Updates and Licensing
Intro
Installing ancoreMaps is quick and simple, following standard Qlik extension procedures. If you want to update an existing ancoreMaps installation, you can follow the steps below too. You can also have a look at Qlik's general guide on Qlik Sense extensions here.
First, download the latest version of ancoreMaps:
- As ancoreSoft Data Captain (customer), you or your consulting partner will be notified whenever a new version is available, including the download link.
- If you're still evaluating, please apply for a trial license.
Once you have downloaded the zipped folder, choose your environment:
- Qlik Cloud — ancoreMaps for Sense version 3.1.72 or higher
- Qlik Sense Enterprise (Server)
- Qlik Sense Desktop
For installing ancoreMaps in Enterprise or Cloud environments, you must have administrator access to the Qlik Management Console (QMC).
Some browsers require a hard refresh after installing a new license file or updating the extension:
- Open the browser development tools with F12 or Ctrl+Shift+I.
- In Network, enable Disable Cache.
- Keep the development tools open and press Ctrl+F5. Save your work beforehand.
Qlik Cloud
Starting with ancoreMaps for Sense version 3.1.72, the extension is also supported in Qlik Cloud. The same installation ZIP file is used for Sense Desktop, Enterprise, and Qlik Cloud. Qlik Cloud does not provide a content library, however, and Content Security Policy entries must be considered.
Step 1 — Include personal files
Qlik Cloud currently has no centralized Content Library. Include your personal files in the installation ZIP before importing it:
- License: Add your
license-4-3file to thelicensesubfolder. - Map files: Add custom map files that are not included in the starter package to the
mapsfolder. - Image files: Add images, including their subfolders, to the
imagesfolder.
Step 2 — Open the Management Console
Sign in to Qlik Cloud with administrator credentials and navigate to Management Console > Extensions.
Step 3 — Update an existing installation
If you are installing ancoreMaps for the first time, continue with Step 4. For an update, use one of these options:
-
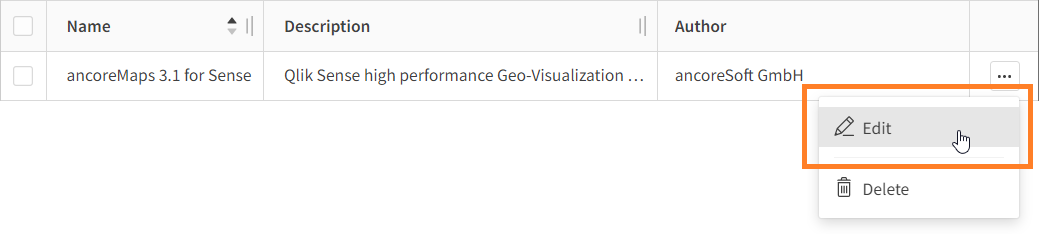
Edit: Click the three-dot button in the far-right column, select Edit, and upload or drag the installation ZIP file to the Management Console.
-
Delete and reinstall: Click the three-dot button, select Delete, and install the extension again as described in Step 4.
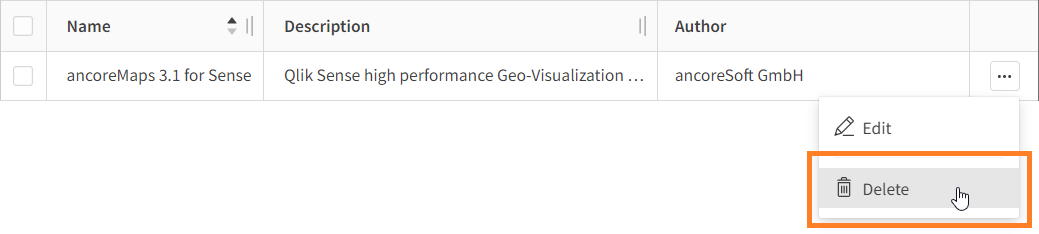
Although the product was renamed to ancoreMaps, the QEXT filename remains NPGeoMapSense_v3 for backward compatibility.
Step 4 — Upload the installation ZIP
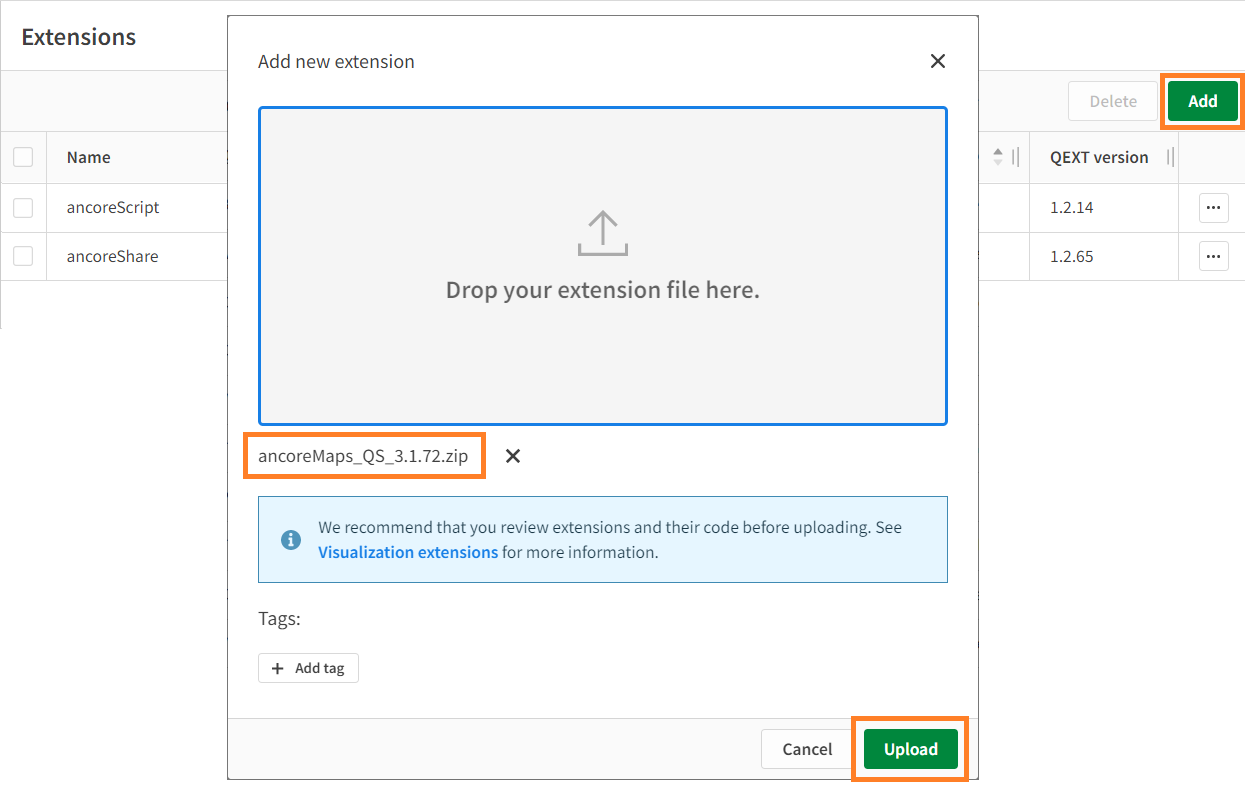
Click Add and Upload, or drag the installation ZIP file to the Management Console. Make sure you completed Step 1 first.
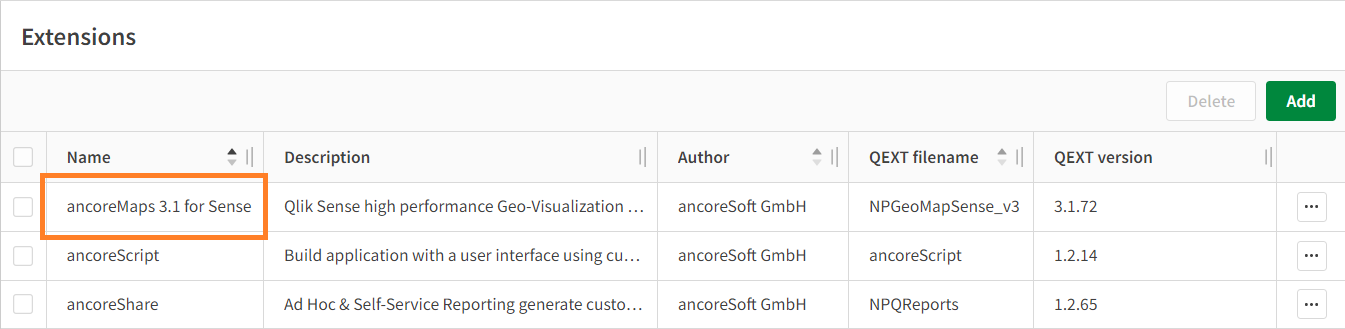
The installed extension is then displayed in the list:
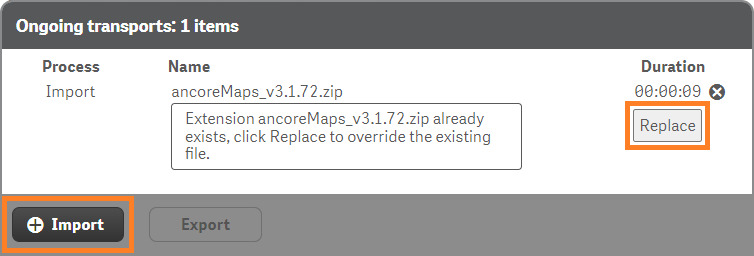
If the following error appears, ancoreMaps is probably already installed. Follow Step 3 to update it.

Step 5 — Add CSP entries
ancoreMaps can use background maps such as Google Maps and OpenStreetMap as well as other geo-services. Qlik Cloud requires these providers to be allowed through Content Security Policy entries. Add the entries required for the services you use:
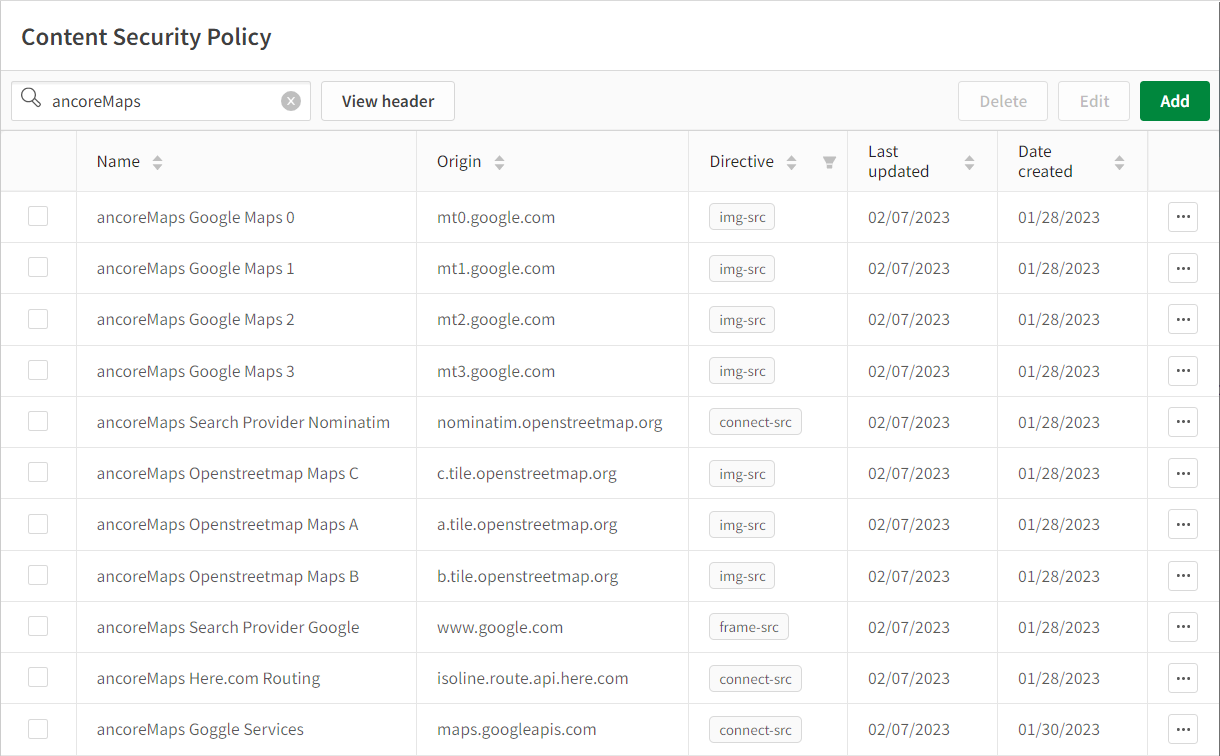
The Name is for your own orientation and can be customized. Enter the Origin and Directive exactly as shown.
You can now start using ancoreMaps.
Sense Enterprise (Server)
Install ancoreMaps through the Qlik Management Console (QMC).
Step 1 — Open QMC
Sign in to QMC with administrator credentials and navigate to Start > Manage Resources > Extensions.
Step 2 — Update an existing installation
If this is the first installation, continue with Step 3. For an update, choose one of these options:
-
Replace: Click Import, select the new installation ZIP file, click Import, wait for it to load, and confirm that the existing installation should be replaced.
-
Delete and reinstall: For a clean update, first back up map and image files that are not stored in the Sense content library. Select
NPGeoMapSense_v3in the extension list, click Delete, and install it again as described in Step 3.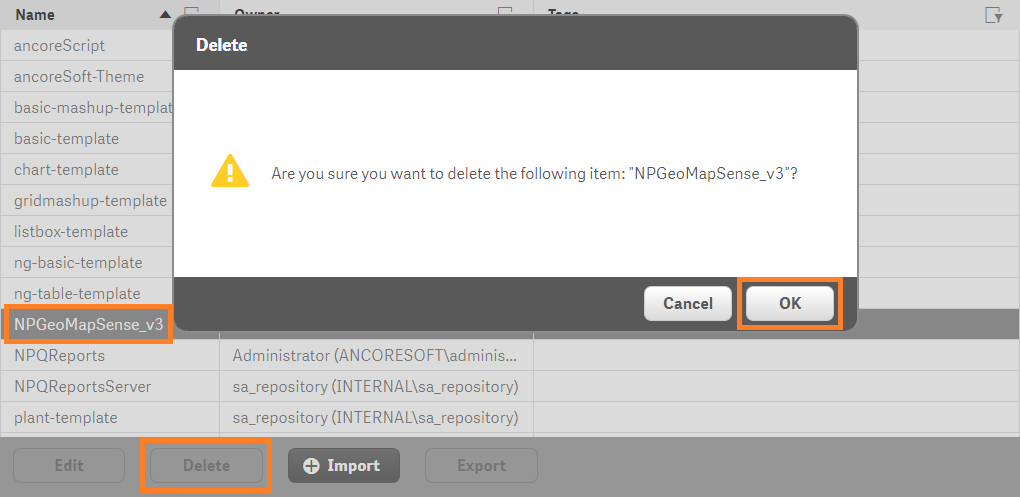
Back up your map and image files before deleting the existing installation. This is not required for files stored in the Sense content library.
The QEXT filename remains NPGeoMapSense_v3 for backward compatibility.
Step 3 — Import the installation ZIP
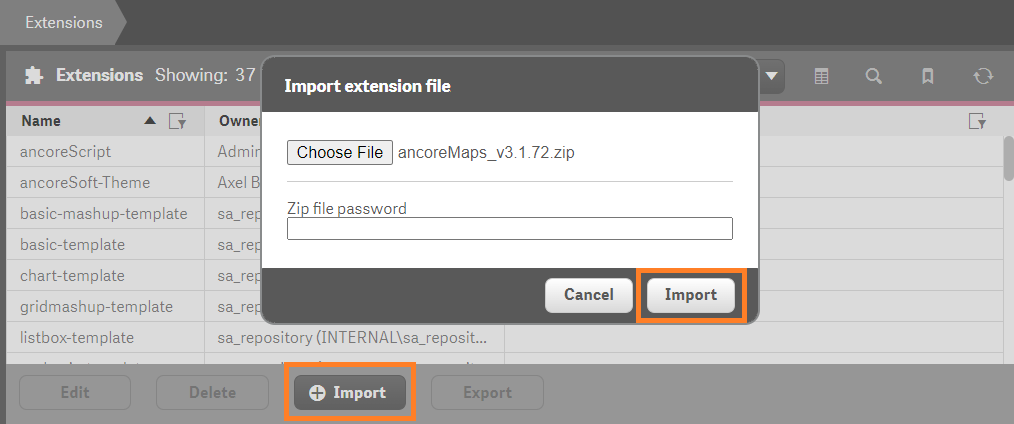
Click Import at the bottom of the list and select the installation ZIP file. No password is required. Click Import in the dialog and wait for the files to load.
The installed extension usually appears at the bottom of the list at first:
<Gallery images={[ ['Installed extension', '/img/ancoremaps/documentation/image-1675847286095.png'], ['Extension details', '/img/ancoremaps/documentation/image-1675847342462.png'], ]} />
You can now start using ancoreMaps.
Sense Desktop
The installation on Sense Desktop consists of extracting the ZIP file into the extensions directory.
Installation
Open Windows Explorer and navigate to the default Sense Desktop extension directory:
C:\Users\[your_user]\Documents\Qlik\Sense\Extensions
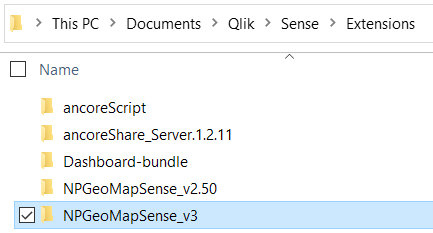
Paste the downloaded ancoreMaps ZIP file into this directory and extract it there. The NPGeoMapSense_v3 directory is added to the extension list.
Update
Use one of these options:
- Replace: Extract the new ZIP file as described above and confirm that existing files should be replaced.
- Delete and reinstall: Delete the current
NPGeoMapSense_v3directory, then extract the new ZIP file. Back up your files first.
Back up your map and image files when deleting the existing installation. This is not required for files stored in the Sense content library.
You can now start using ancoreMaps.
Next step
- Continue with the ancoreMaps 3.1 documentation overview.