Qlik Cloud
Installation in Qlik Cloud
To install your personal ancoreSoft License Extension, as well as ancoreShare Extension and ancoreScript in Qlik Cloud (SaaS), please perform the following steps.
Upload Zip Files
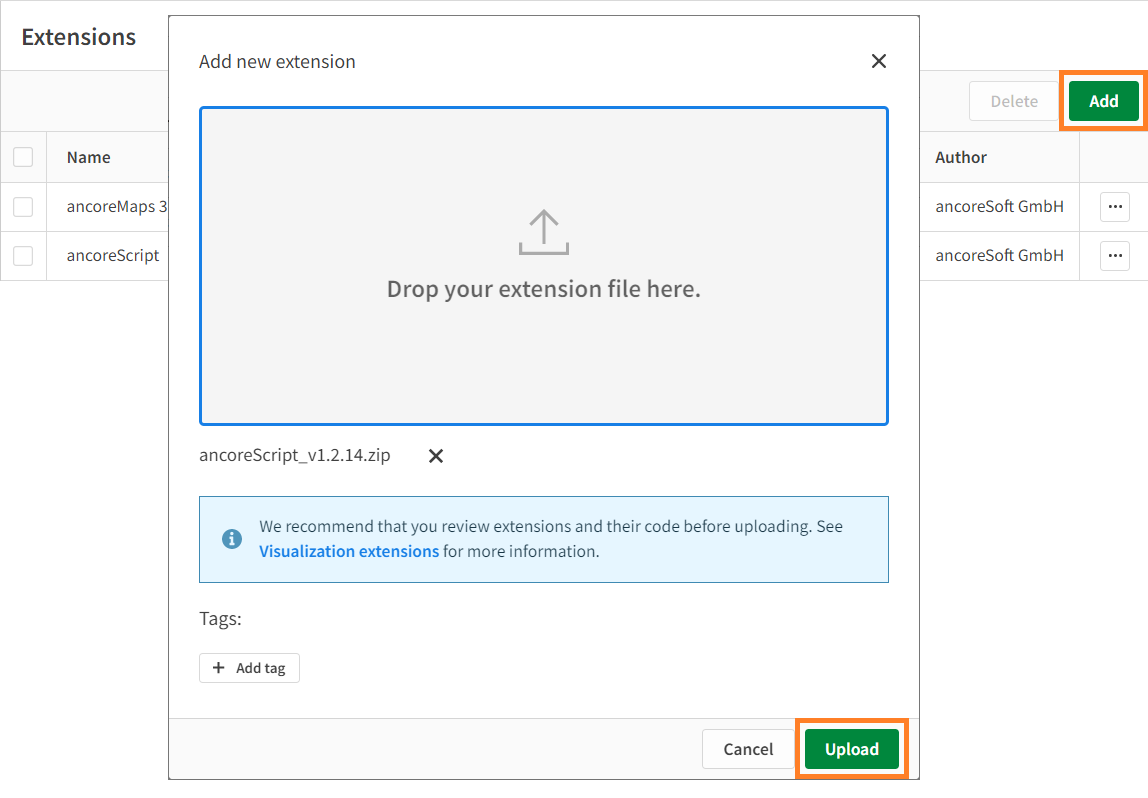
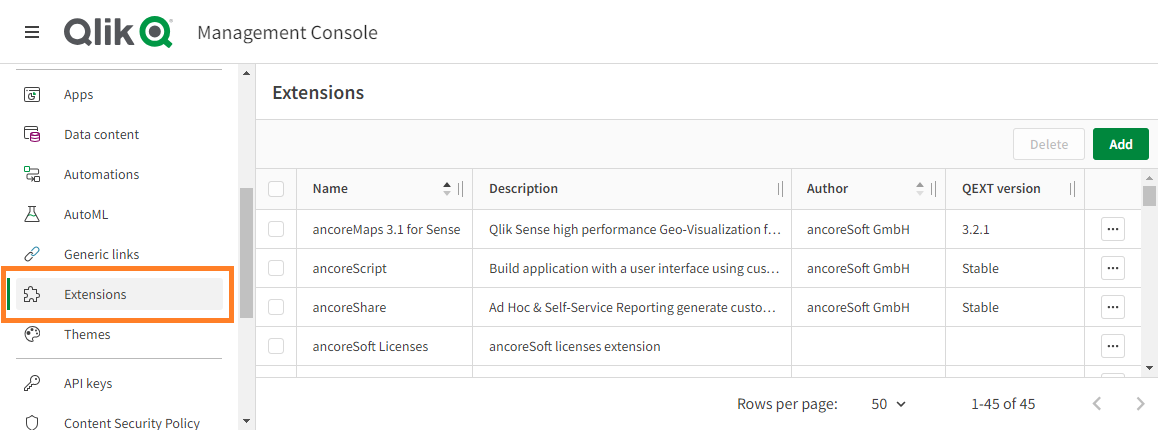
Log on to your Qlik Cloud environment using administrator credentials and navigate to Management Console → Extensions. Click on Add and upload or drag the installation zip file to the management console. Then click on Upload.
Repeat this step for each installation zip file:
XXXXXXXX-XXXX-XXXX-XXXX-XXXXXXXXXXXX.zip(your personal ancoreSoft License Extension, showing your account number)ancoreShare_Extension_stable.zipancoreScript_Extension_stable.zip
You have successfully installed ancoreSoft Extensions:
Although we re-branded the product name to ancoreShare, we chose to stay downwards compatible in respect of our long-time users, hence the QEXT filename will continue to be "NPQReports".
Should you see the following error message in Qlik Cloud, you probably already have an existing installation of ancoreShare Extension or ancoreScript. In that case please refer to the following step for details.

For manual updates only
If you operate with an ancoreShare Extension or ancoreScript version that requires manual updating you can either edit, or delete and re-install your existing extensions:
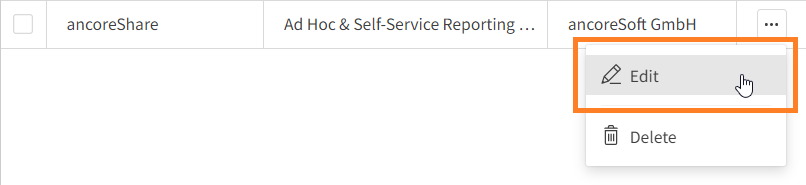
Option 1 (Edit): Click on the three dots button in the far right column and click on Edit. Then upload or drag your installation zip file to the management console.
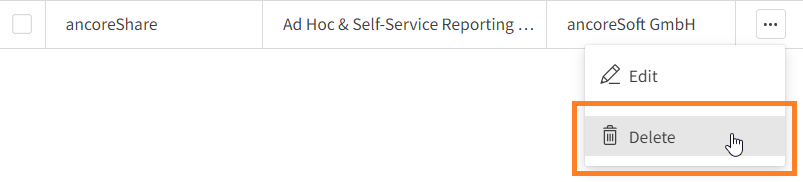
Option 2 (Delete): Click on the three dots button in the far right column and click on Delete. Then newly install/add the extension zip file as described in the previous step.
Add CSP Entries
To allow access to the ancoreSoft CDN server to manage your extension and licenses as well as optionally certain other functionalities, you need to add the following entries in your Qlik Cloud Management Console's Content Security Policy. In general you have the flexibility to name the policy as you wish. However, it's crucial that you input the Origin URL (including https:// although it's not displayed in the interface afterwards) and Directives exactly as provided.
Please ensure that the Origin and Directives are entered without any changes, to guarantee the policy functions as intended.
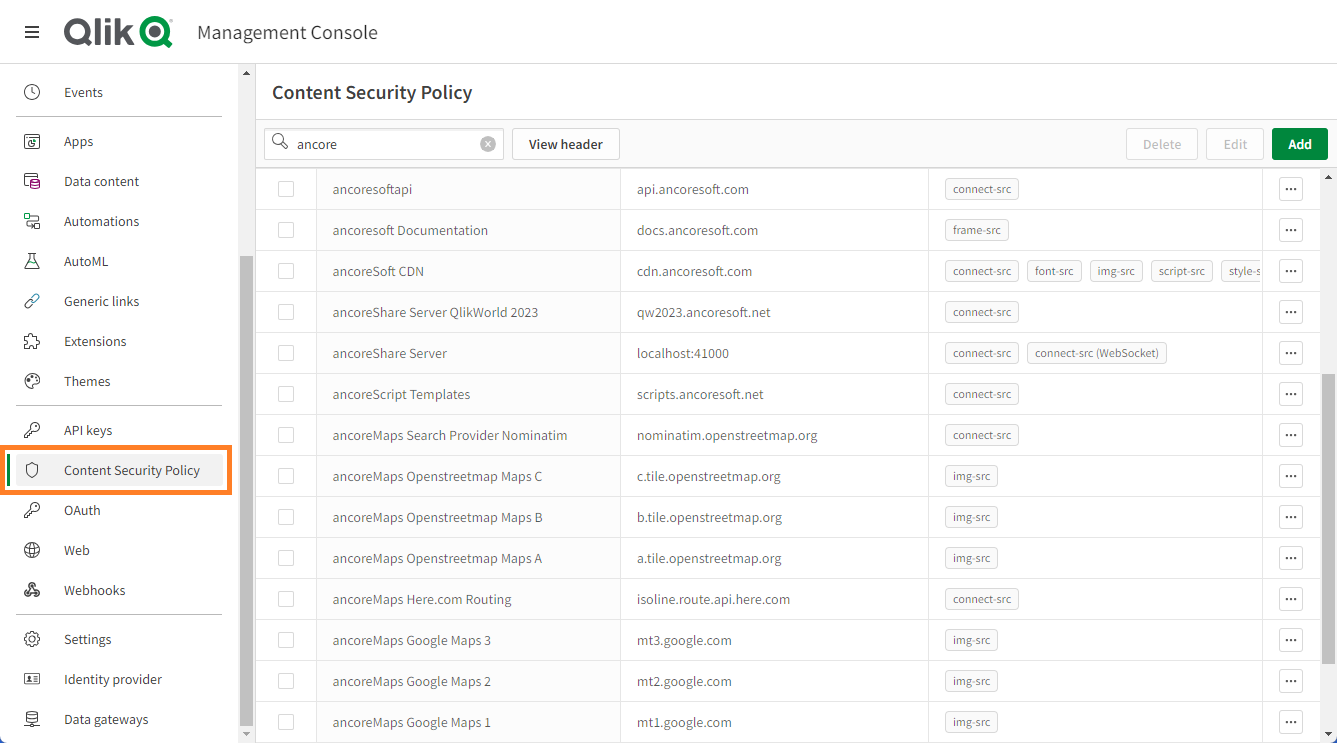
To create a new CSP:
- Click on Add (green button in the top right corner)
- Enter a Name
- Set the provided Origin URL
- Check the required Directives
- Click on Add
The following CSP entries are either required or optional for ancoreSoft extensions:
| Name | Origin | Directives | Required |
|---|---|---|---|
| ancoreSoft CDN | https://cdn.ancoresoft.com/ | connect-src, font-src, script-src, style-src | required |
| ancoreSoft API | https://api.ancoresoft.com/ | connect-src | required |
| ancoreShare Server Email Relay | your ancoreShare Server URL (learn more) | connect-src | optional – emails via ancoreShare Server |
| Brevo Email Relay | https://api.sendinblue.com/ | connect-src | optional – emails via Brevo (formerly Sendinblue) |
graph.facebook.com | connect-src | optional – export to WhatsApp | |
| ancoreScript Templates | https://scripts.ancoresoft.net/ | connect-src | optional – ancoreScript templates & code snippets |
| OpenAI | https://api.openai.com/ | connect-src | optional – ancoreScript OpenAI GPT-3 integration |
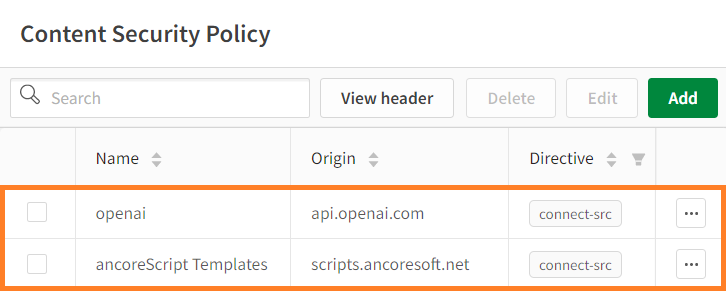
You can now start using ancoreShare Extension & ancoreScript to create amazing reports & all kinds of events and tools directly from within your Sense apps!
Licensing Named Users
This step is optional and only applies if you have a license for less users than there are in your Qlik Cloud environment. For example, if you have a total of 1000 users on your Qlik Cloud tenant (that is Analyzer and Professional users together), but you only purchased an ancoreShare Extension license for 50 users, you will need to follow this additional step.
If you have purchased a license for a particular Qlik environment with unlimited ancoreSoft Extension users, this step is not necessary and you're already all set up by simply adding your personal ancoreSoft License Extension to your Qlik Cloud Management Console in the previous steps.
This step is only required, if you purchased a license for named users, instead of licensing a particular Qlik environment with unlimited ancoreSoft Extension users (learn more).
For those with a Named Users License the following section explains how to assign your Qlik users to your ancoreSoft license.
Assign named users
You can assign Qlik Cloud users to an ancoreShare license by creating a Space in your Cloud. Every Qlik user (no matter if Analyzer and Professional), who should have access to a licensed ancoreShare Extension on any dashboard, must be a member of that space.
Make sure the number of members in the space does not exceed the maximum number of users allowed with your license, otherwise no user will have access.
In the ancoreShare About Dialog you can check how many users are currently allowed with your license.
How to create a space and assign users:
-
Log on to your Qlik Cloud using administrator credentials and navigate to Management Console → Spaces.
-
Click on Create new, choose the Type: Data and give this new space the Name:
ancoreSoft.ancoreShare(a description is optional). It's important to spell the name exactly like this.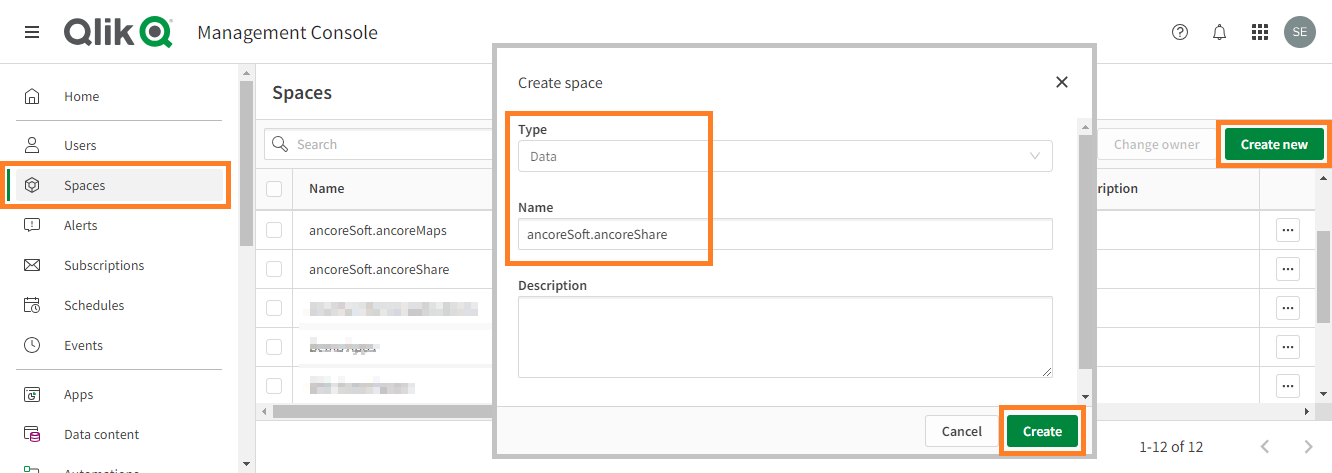
-
Once the space is created, you can click on the three dots to the right to Manage Members of that space. Add all Qlik Cloud users there, that should have access to ancoreShare Extension. You can reassign users in your space at any time.
From now on all your licenses will be managed automatically for all your ancoreSoft extensions.
Next Steps
- Add ancoreShare to your Sense sheet
- Get to know the Menu Interface
- Start Designing Reports